To create a Google Ads campaign from the Keyword Planner
-
Log into your Google Ads account
-
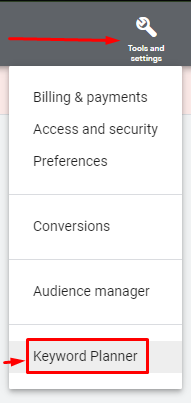
Click on Tools and settings from the upper right part of your account and select Keyword Planner
-
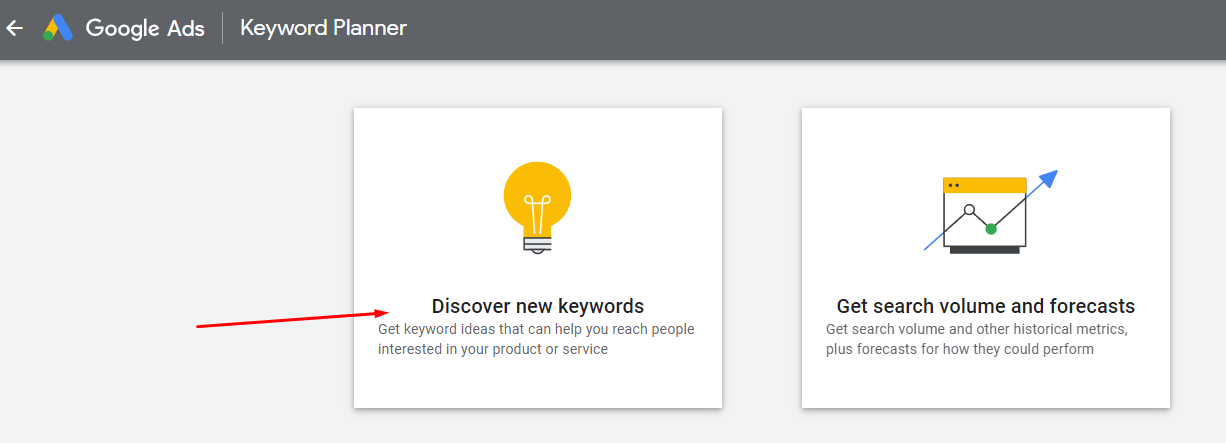
Click on Discover new keywords to find keywords related to your niche
-
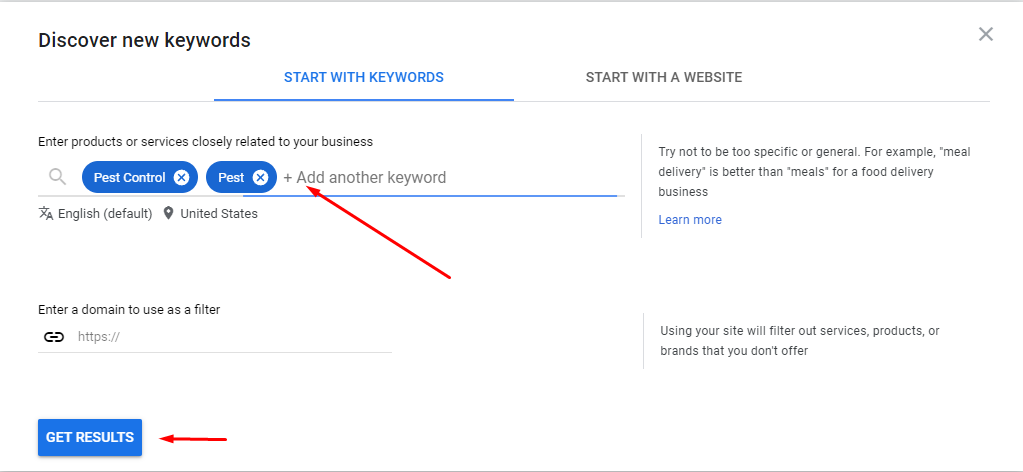
Key in some keywords related to your niche and click the Get results button
-
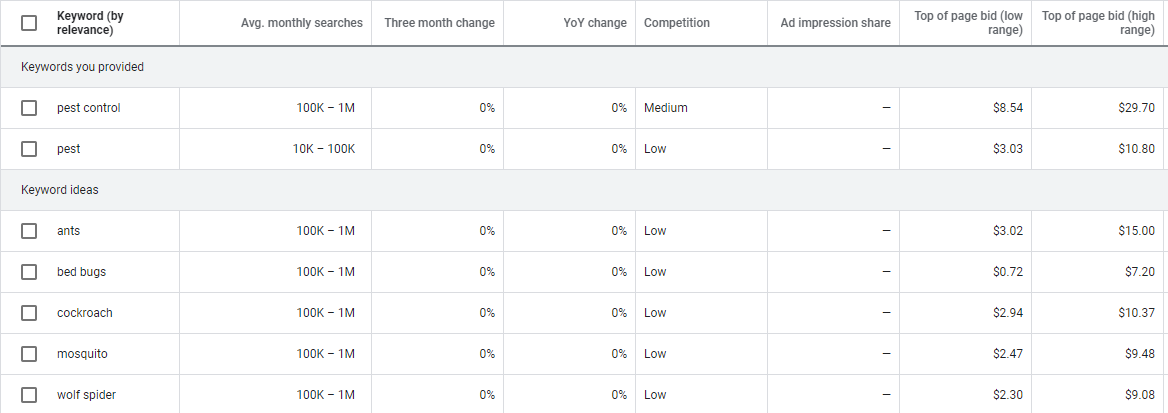
You’ll get keyword results and will be able to see the average monthly searches these keywords have as well as the level of competition and other helpful details
-
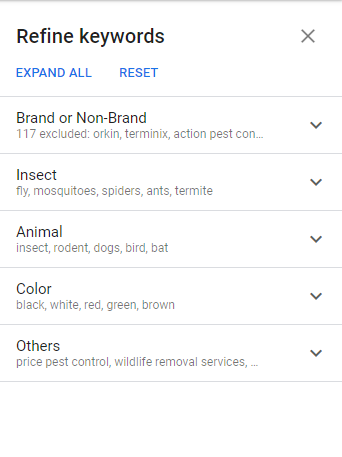
You can also use the Refine keyword window on the right side to filter the keyword results and include only the applicable keywords to your campaign
-
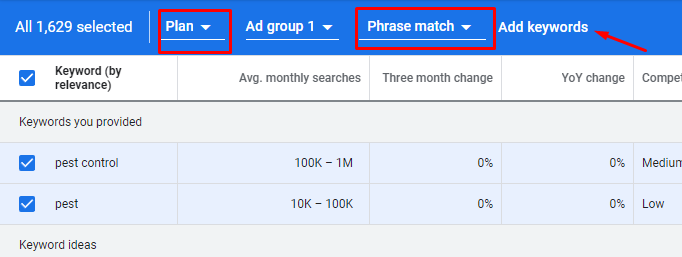
Once done, you may select all the keywords that you’d like and put a checkmark on the tickbox where it says Keyword by relevance to have the option to select all the keywords remaining on the list.
-
After selecting all the keywords, you may now add them into a plan, but make sure to change the keyword match type to Phrase Match first then click the Add keywords button
-
Once added, you’ll see a message that says the keywords have been added to your plan and you may click the View Saved Keywords button on it or use the one from the left side menu
-
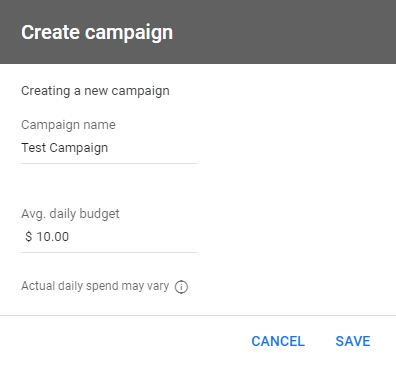
Here, you’ll have the button to create a Campaign. After clicking the button, you’ll be able to set the campaign name and budget
-
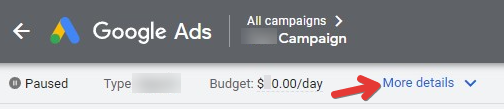
You can edit the settings of your campaign before creating the Ads by clicking the More details button and the Edit settings button
-
You can follow this article for more settings recommendations on your campaign setting up your first campaign.