Goal: To add the Facebook pixel to your site.
Ideal Outcome: The Facebook pixel is properly installed without any technical issues.
Prerequisites or Requirements: You can only do this once you have your landing page setup. You should have also already set up a Facebook Ads Account using Business Manager.
Why is this important?
Facebook Pixel is essential if you want to use Facebook advertising. With this pixel, you can create remarketing audiences and set up conversions for your campaigns.
Where is this done?
In your WordPress account via your Website and your Facebook Ads manager.
When and how frequently is this done?
Only once—the first time you install the Facebook pixel.
-
Environment Setup
Important:
-
This document describes the process of installing the Facebook Pixel using Facebook for WordPress integration.
-
You should have created or gotten access to your company’s Facebook Business Manager account before following this process.
Before you start:
-
Install the Facebook Pixel Helper Chrome Extension.
-
Installing the Facebook Pixel
-
Log in to Facebook.
-
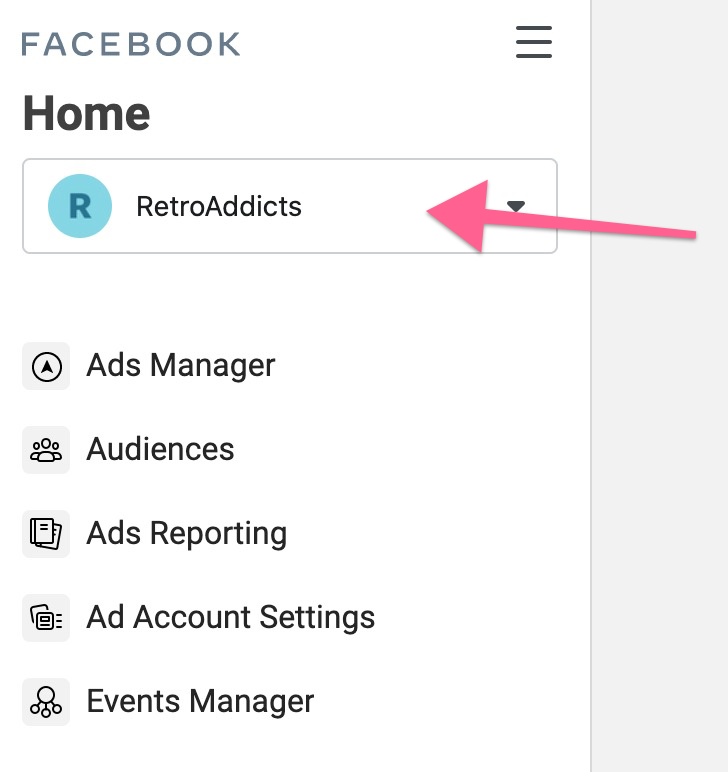
Go to your Facebook Business Manager.
-
Make sure to select the right Business Manager account from the dropdown:
-
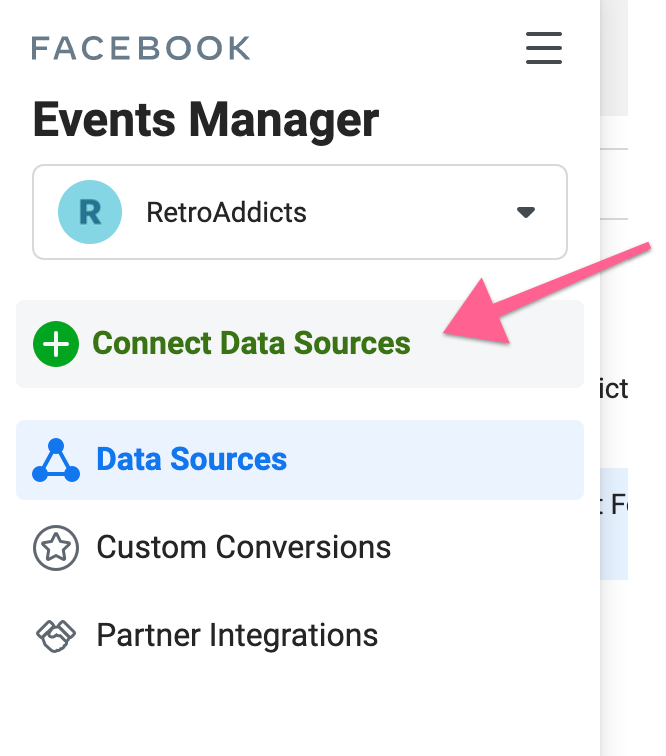
Next, click on “Events Manager”
-
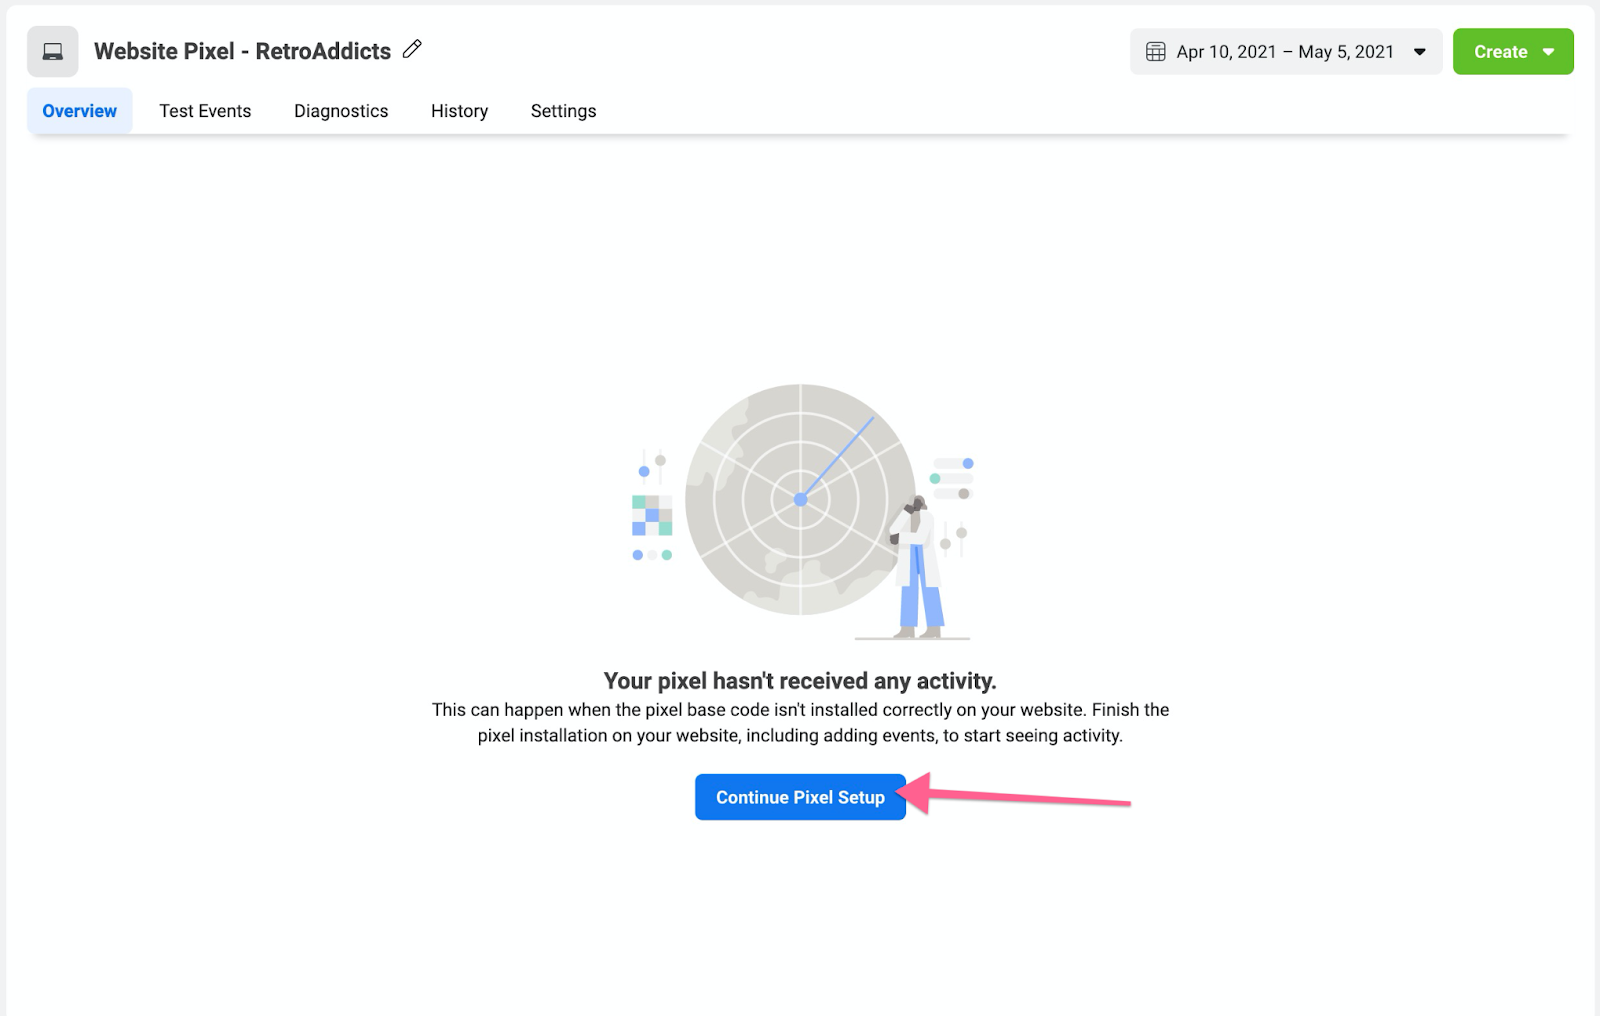
If a Pixel has already been created but hasn’t been installed yet, select it from the list on the left and click “Continue Pixel Setup” (then follow jump to step 7)
-
If this is the first time creating a Pixel for this business:
-
Click on “Connect Data Sources”
-
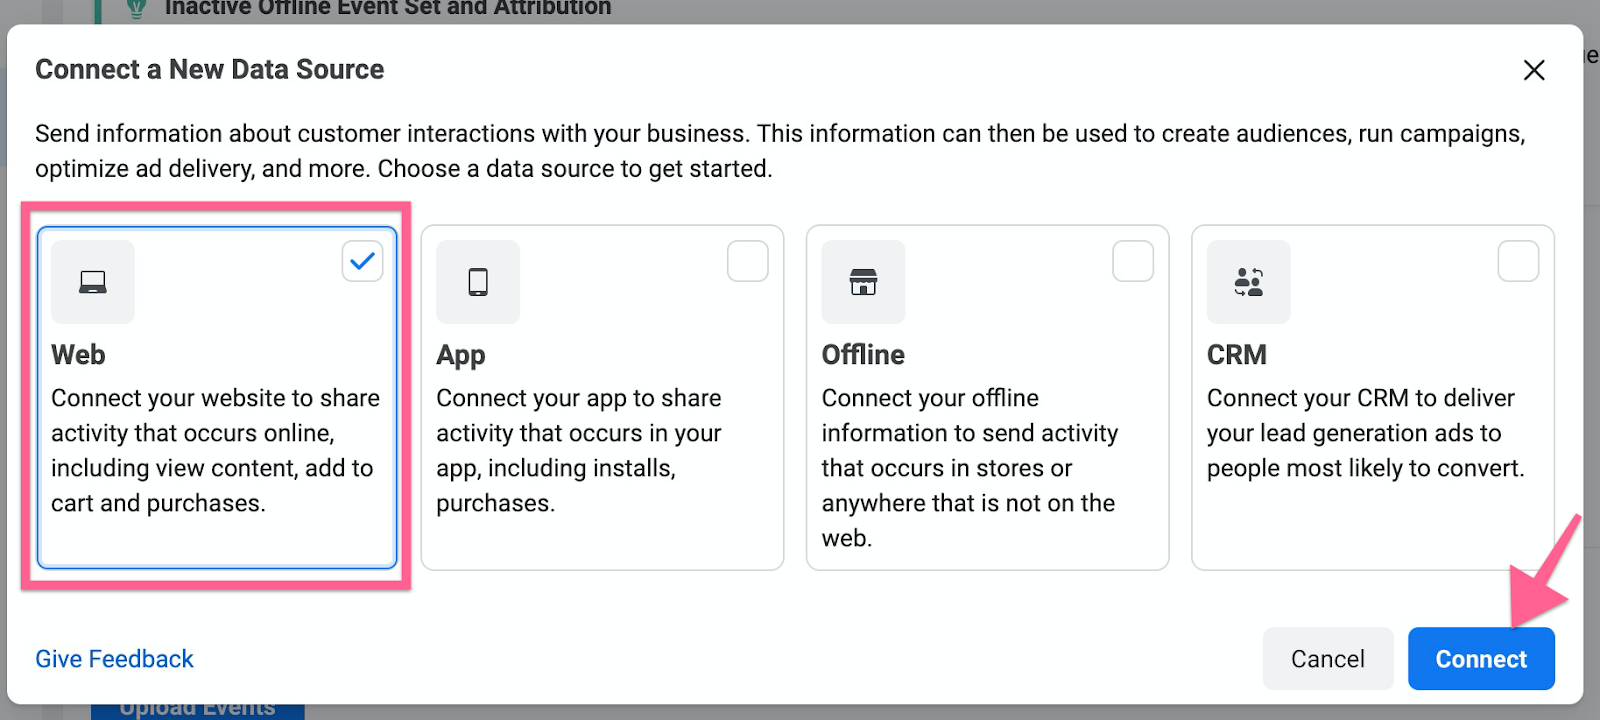
Select “Web” from the list, and click “Connect”
-
-
Select “Facebook Pixel” from the list, and click “Connect”
-
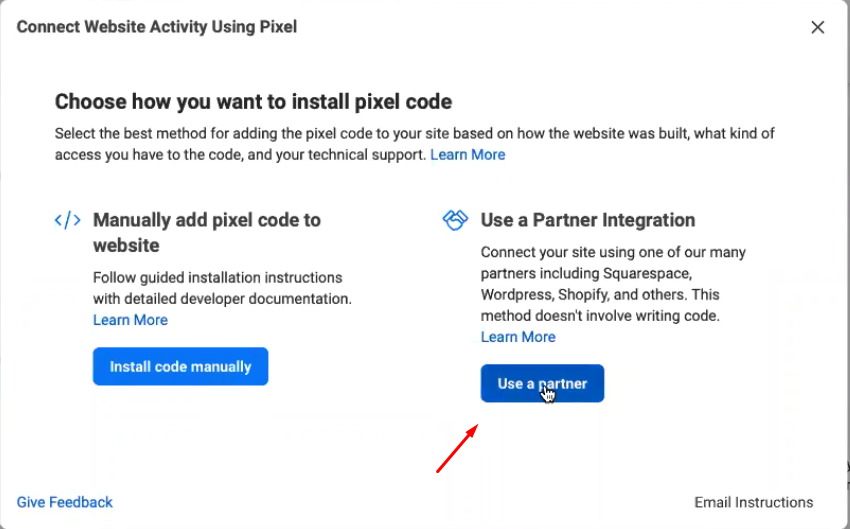
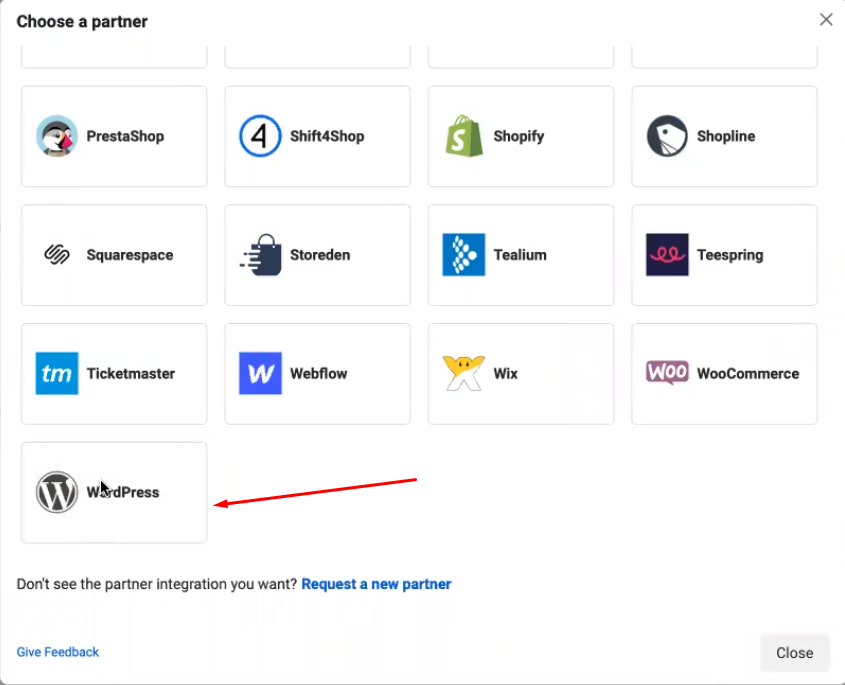
Select Use a Partner Integration
-
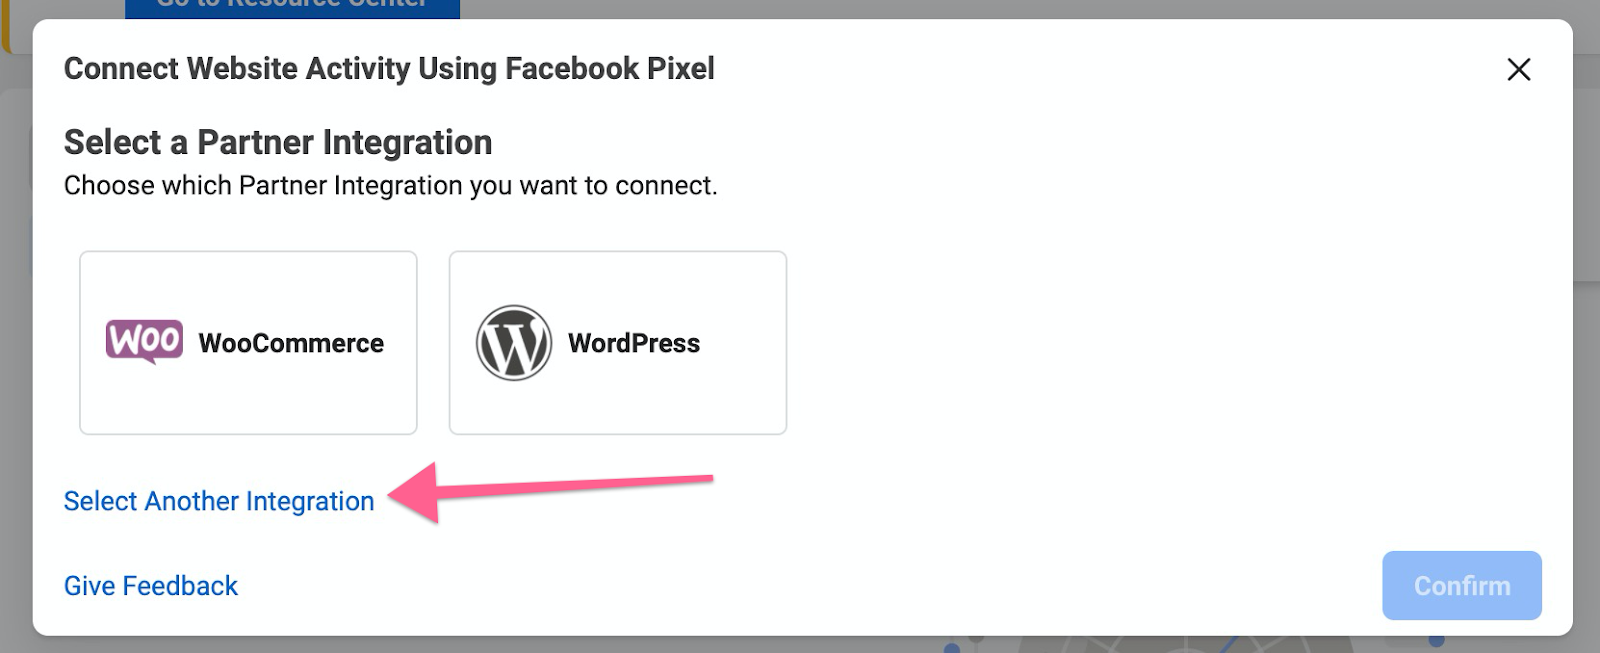
You will be presented with a few options to install your pixel. If the option WordPress isn’t listed, click on the “Select Another Integration” option
-
Select “WordPress” from the list
-
You will be asked to open your landing page WordPress admin access to install and activate the “Facebook for WordPress” plugin


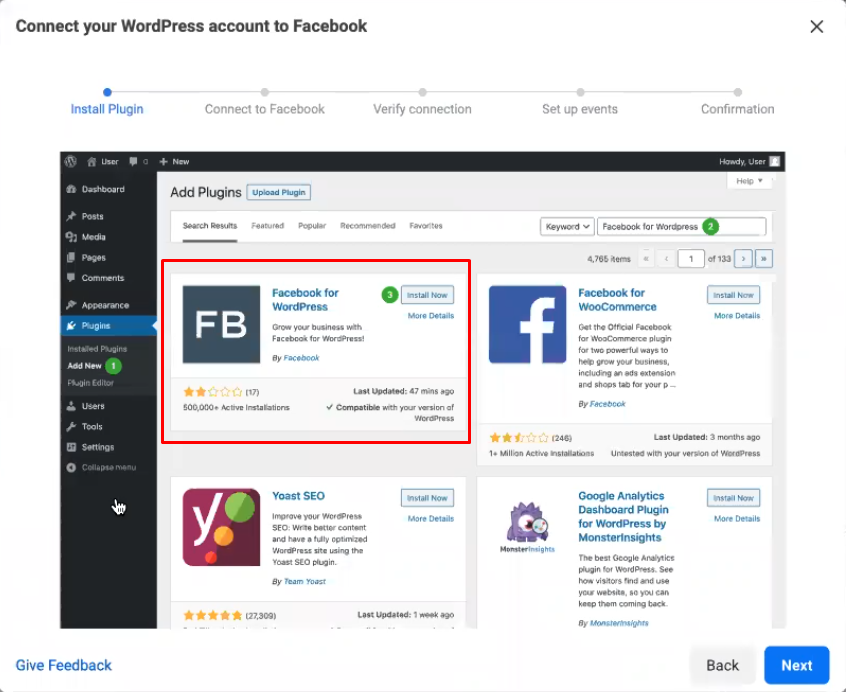
- Steps for Installing Facebook for WordPress plugin
-
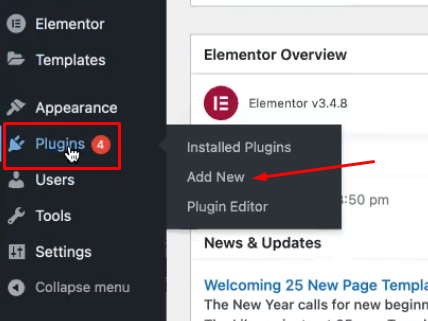
On your WordPress, click on Plugins from the lefthand menu and select Add New
-
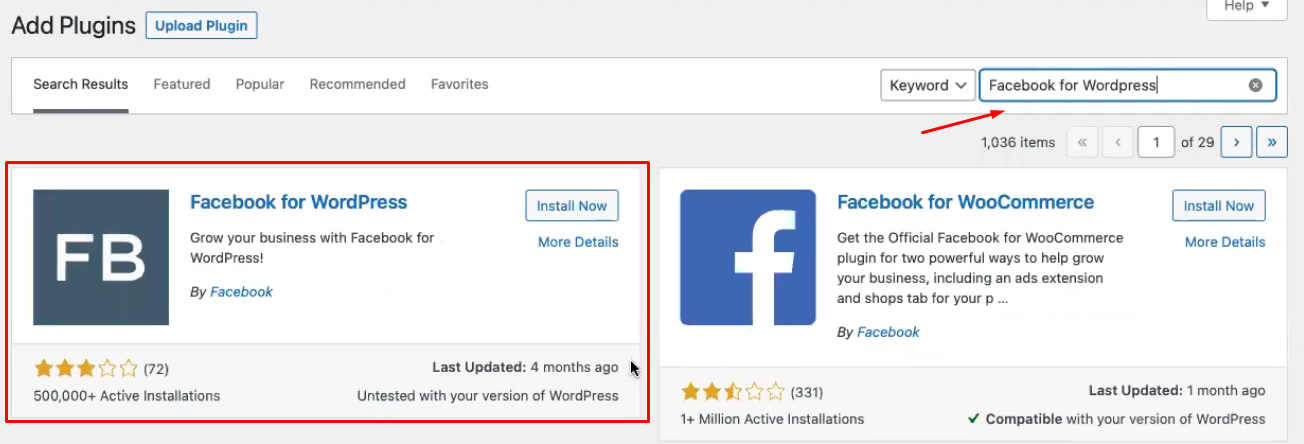
Search and choose Facebook for WordPress
-
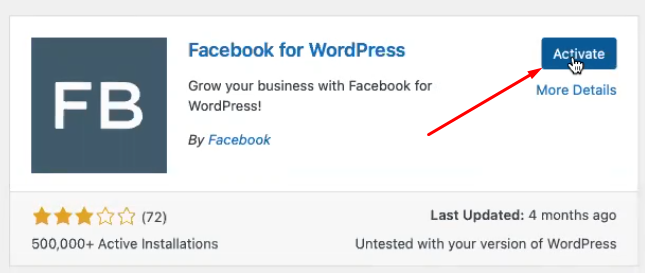
Select Install Now
- Afterward, click on Activate
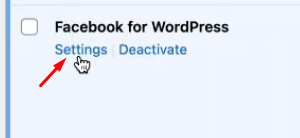
- Next, from the list of Plugins installed in your WordPress, locate the Facebook for WordPress plugin and click settings right below it.
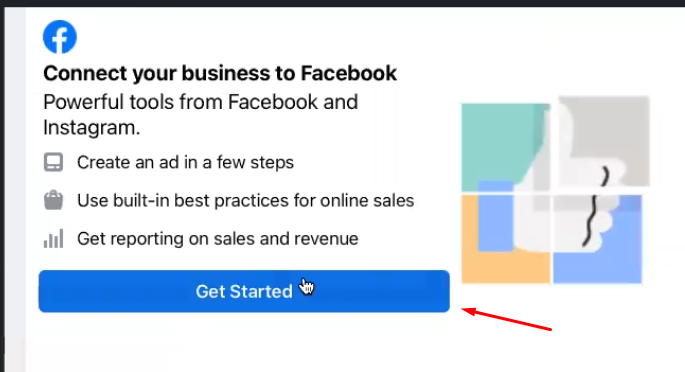
- We’ll then proceed with connecting your Facebook to your WordPress which can be done by clicking the Get Started button.
-
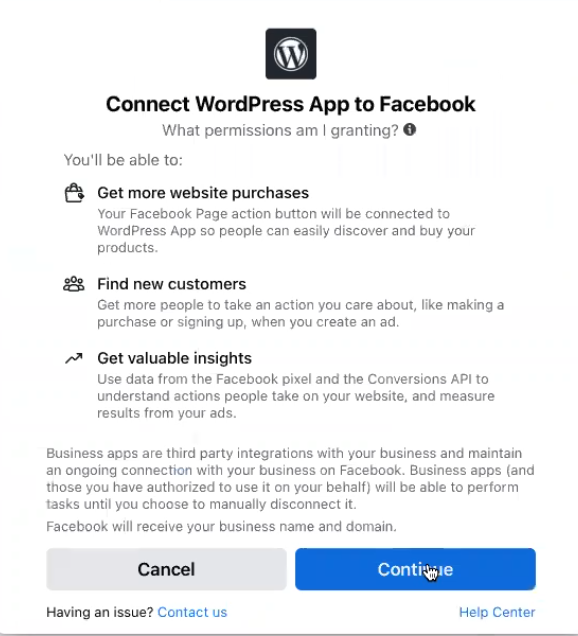
A new window will open up which will confirm which Facebook account would you like to connect to your Landing page. Once selected, click on continue.
-
Also, press the Continue button in this part to verify which permission would you like to grant.
-
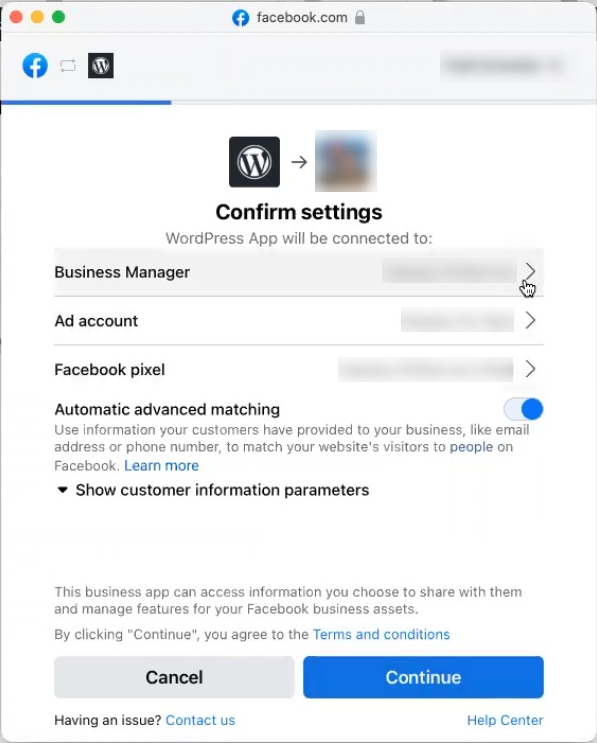
On the next page of the setup wizard, you’ll have to connect the correct Business Manager, Ad Account, and Facebook Pixel by clicking the arrowhead across them. Once done, click on Continue.
-
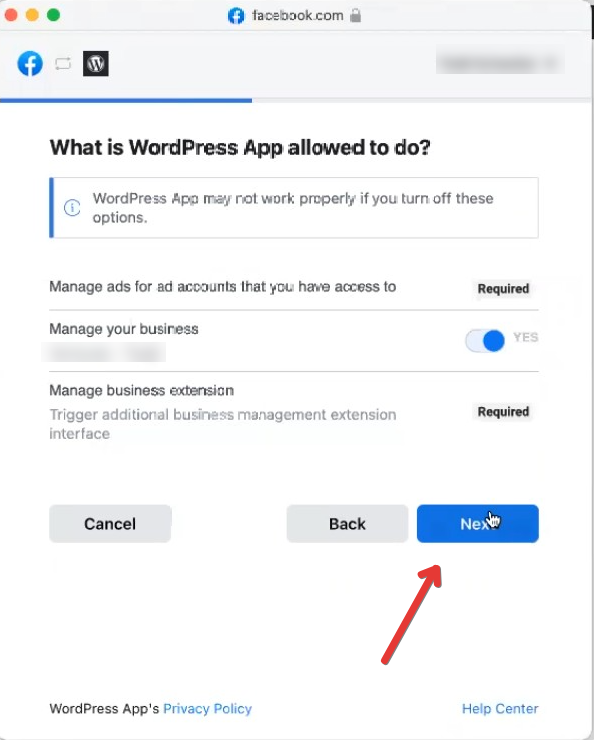
On this part, you just need to verify that the correct Business Manager is connected, then hit Next.
-
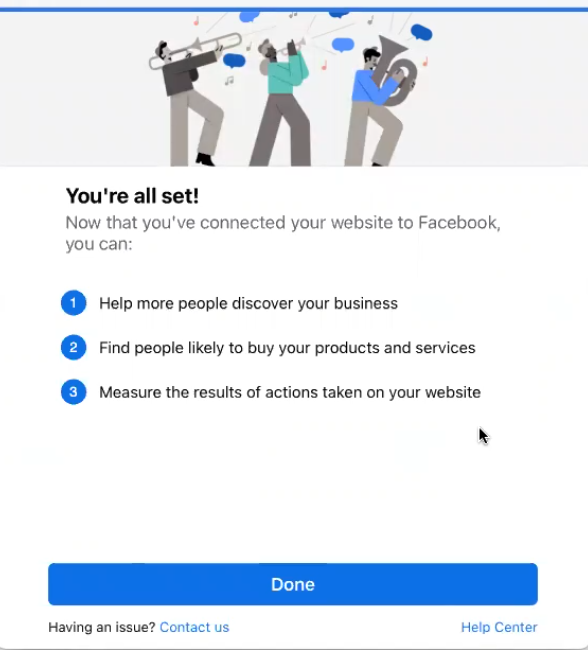
Once done, you’ll see the message that says “You’re all set!”, then you can click Done to close the setup wizard.
-
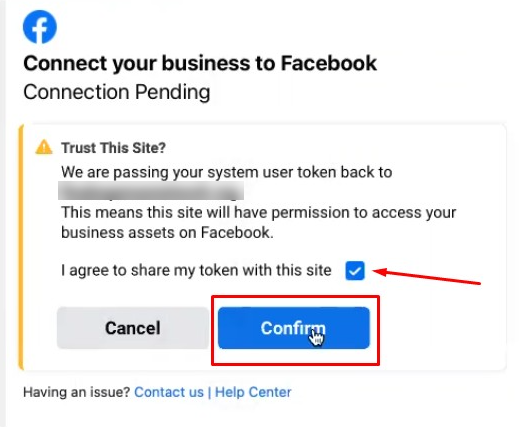
You will then be asked to confirm to Trust the Site you’ve connected to your plugin. Pur a checkmark on the tick box to get the Confirm button to turn blue and become clickable.
-
After confirming, you’ll see that your WordPress is now connected to Facebook.


-
After all these steps, you’ll have to go back to your Facebook tab and you’ll have to verify if your pixel is firing correctly by adding your website in the space provided. Then hit the Send Test Traffic button.
-
Once it is completely loaded, the wizard status will change from No Activity Yet to Active. Them click the Next button.
-
The next part is adding events using the Event Setup Tool. You just have to enter your website URL and click the Open Website button.


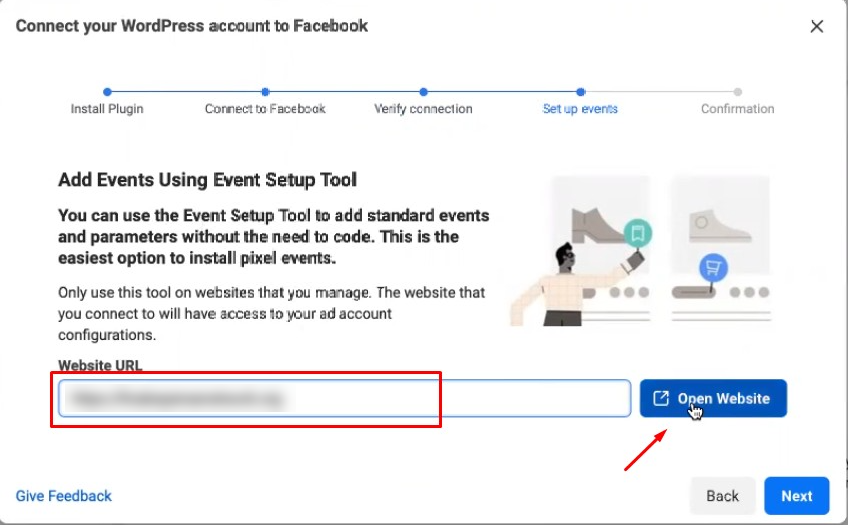
- Note: Make sure to have your pop-up blocker turned off or you’ll get this error message.

-
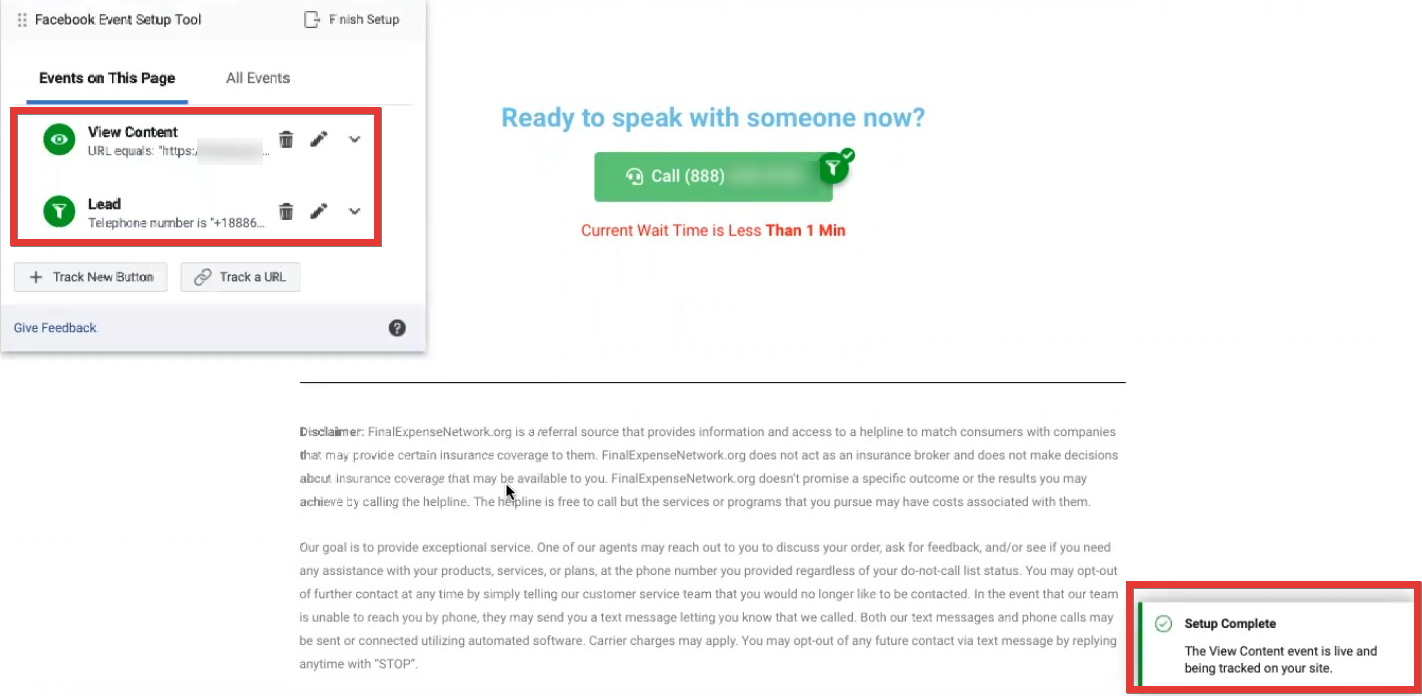
Once your website loads up the Facebook event setup tool should be seen floating on your website and you may start tracking traffic by using both Track New Button and Track URL.

-
Using Track New Button
-
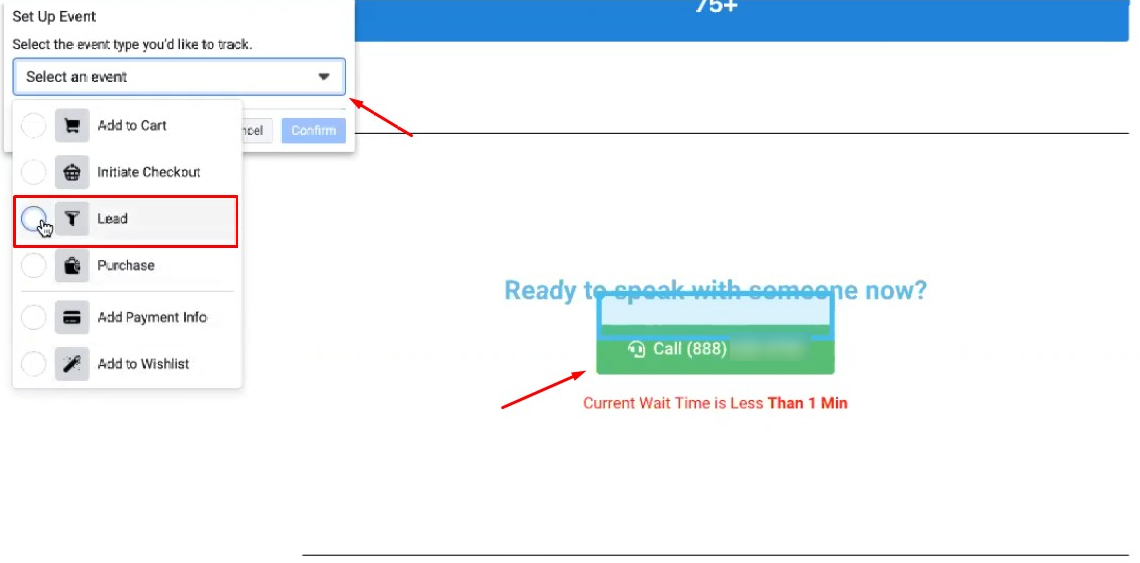
After clicking this button, scroll down to your website until you see the highlighted green button with your phone number, click on it and a wizard will appear.
-
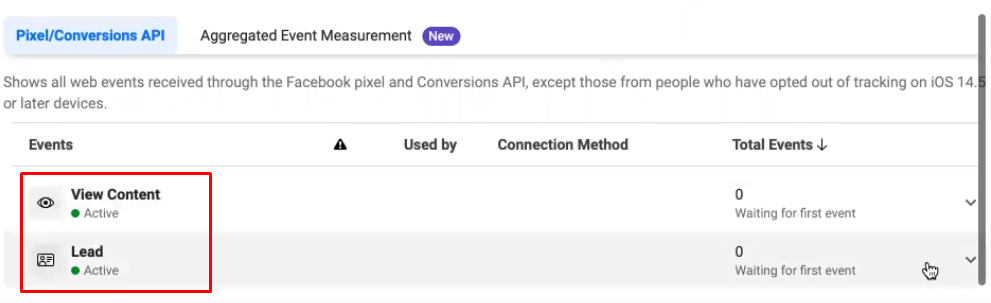
You’ll be asked to set an event, click the drop-down button, and choose Lead, and hit the Confirm button next.
-
- Using Track URL button
-
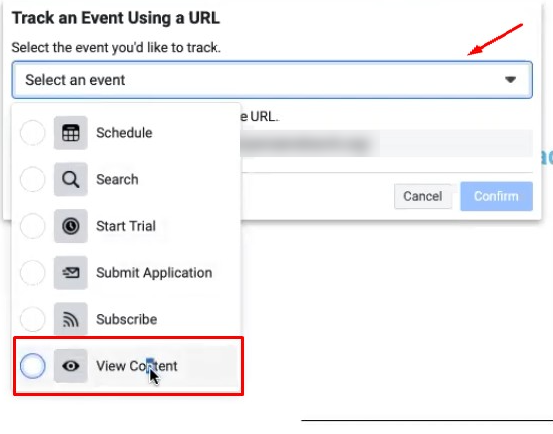
After clicking this button, your website URL will be shown and in the field where you are being asked to select an event, click the drop down option and choose View Content and hit the Confirm button on the next page.
-
Once done, setting the Events, you’ll see them added to your website page. Go back to the Facebook tab and hit the Next button.
-
-
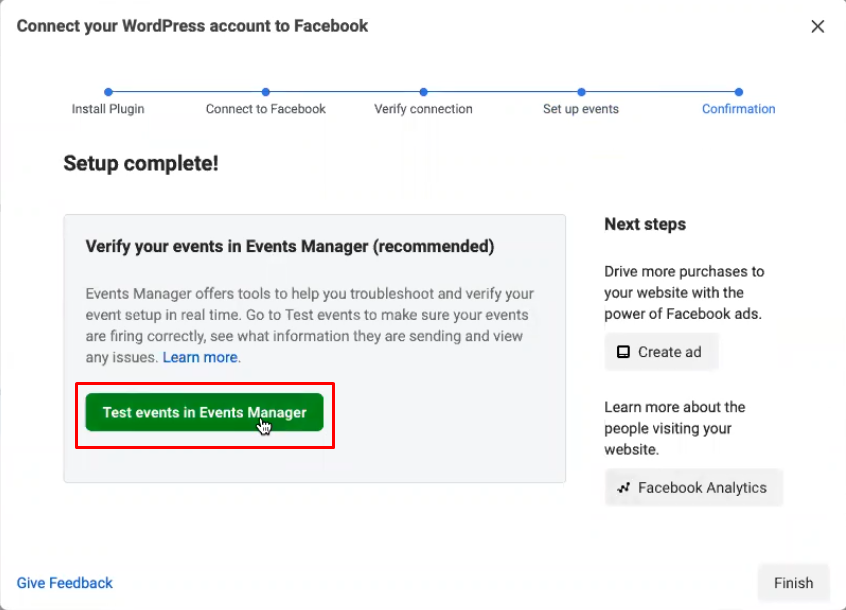
Here, you’ll see that your setup is complete and you’ll have the button to Test events in Events Manager.
-
The new page will show you all the events data that your website will have from the events that we added to your site.
-
And you’re all Set! Congratulations!